The Apple Photos app is included with any iPad, Mac or iPhone and it’s where all those selfies you take are stored. But it can also help you organise and edit your photos as well as share them automatically between all your Apple devices.
In this post, I’ll just point how to access some of the features needed to undertake Basic Editing, first on the iPad and then later on the Mac.
Photos on iPad
Finding the photo that you want to edit will depend on how your Photos library is organised, but you may find it in your photos timeline or in an album, if you’ve created one. Once you find it, touch on it to select it and it’ll look like the image below.
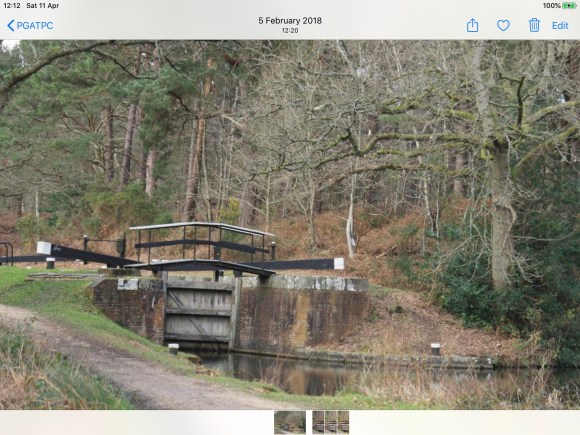
You can access the editing tool by touching “Edit” in the top right hand corner of the screen. Then we can access the 3 basic techniques – Cropping, Adjusting Tone and Adjusting Colour.
Cropping
Once you’ve chosen Edit, the screen will look as below.

The main editing tools are selected by touching the icons on the left side. The top one, we’ll use for adjusting tone and colour. The bottom one we’ll use for cropping. Touch it, and the detailed controls come up on the right side. The top of the 3 circular icons on the right allows you to tilt and level the image by dragging the scale up and down.
Cropping to reduce the image is done by touching the corners of the image and dragging them across the screen to the point you want. You may like to keep a particular shape of image (or aspect ratio), perhaps square, or 16:9 like a TV screen or 3:2 like a traditional photo print. You can choose those by touching the shaded rectangle icon at the top of the screen.
Tone
Selecting the top icon on the left side (the one that looks like a volume knob) opens the “ADJUST” section and presents the detailed toning and colouring controls that appear down the right hand side. If you touch any of the symbols on the right hand side, a label will be displayed saying what it does, so you don’t have to remember them all.

The first few symbols on the right control tone, so you’ll find Exposure, Contrast, Shadows and so on. As you select each, you have a scale to the right you can use to make the adjustment.
Colour
The controls for colour are also in the ADJUST section, but you have to scroll down the list of symbols on the right (touch and drag upwards) as there are too many controls to all fit on at once ! But one you get there, you’ll find Saturation amongst other interesting options.

Once you’ve finished editing, click Done and you’ll return to the front screen of Photos !
Photos on Mac
The process for using Apple Photos on the Mac is pretty similar to the iPad, although the layout of the screen is a little bit different.
Opening the photo you want to be edit is much the same though.
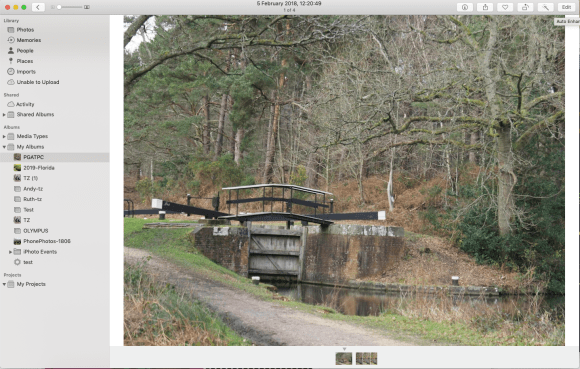
So as with the iPad, find the photo you want, click on it to select it and then click “Edit” in the top right hand corner.
Cropping
Once the edit screen opens, you’ll see that this time the main three option – Adjust, Filters and Cropping are arranged along the top of the screen. Let’s choose “Crop” first.
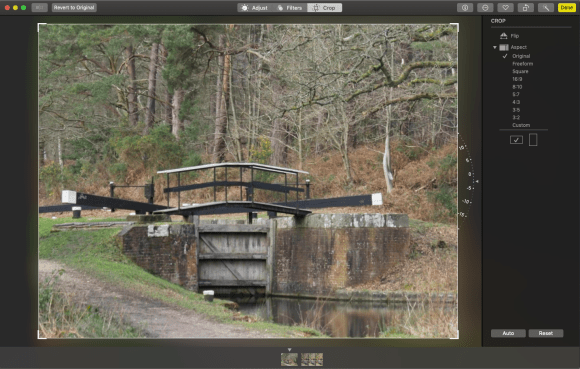
The dial to the right hand side of the image will allow you to level it. Click on the dial and drag to make it turn. As before, selecting just a part of image is done by grabbing the corners of the picture and dragging them to where you want them. A particular image shape can be chosen in the column to the right.
Tone
As on the iPad, the “Adjust” section will include both Toning and Colouring controls. Click on Adjust at the top of the screen.

A wide selection of tone and colour controls is displayed to the right, each with a small right facing arrow to the left side. Click on that arrow and the section will open to show a range of possibilities:
- Auto – to automatically choose a value for these settings
- A small image that shows the general effect of this section You can click that image or click and drag the pale central bar from side to side to change the effect
- Individual sliders to change the values of the setting.
You’ll find Exposure, Contrast, Shadows and so on amongst these controls for you to male your adjustments.
Colour
Looking further down the list of options on the right hand side of the screen when Adjust has been chosen, you’ll find Colour and that’s where you can adjust the saturation to give richer colours in the image.
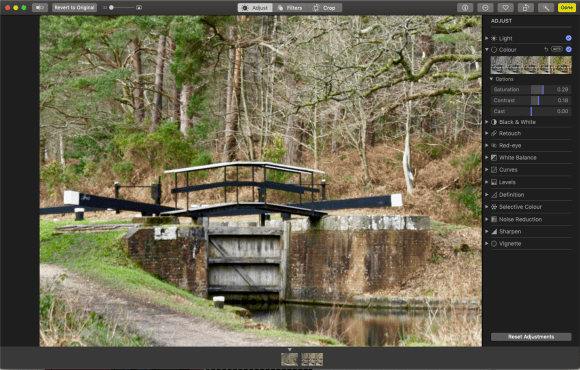
Once you’ve finished editing, click Done and you’ll return to the front screen of Photos !
