
Affinity Photo is a photo editing application available on Mac, Windows and iPad. It is aimed at expert and professional users in competition with Adobe Photoshop and includes a very wide range of capabilities to create complex and sophisticated digital image effects. As with all complex software, it’s very beneficial to make sure you grasp the basic ideas behind how it works so I really recommend the video tutorials that Serif provide on their website at https://affinity.serif.com/en-gb/learn/
Of course, alongside its advanced features, Affinity Photo also covers the basics of editing and in this post, I’ll point out how to access some of the features needed to undertake Basic Editing, first on the iPad and then later on the Mac.
Affinity Photo on iPad
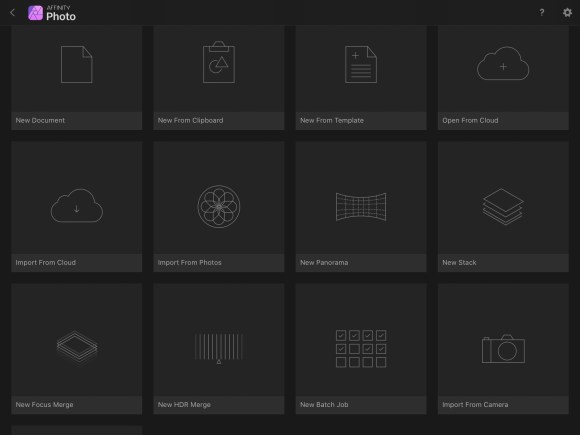
Affinity Photo is not a photo organisation tool like Apple Photos, Adobe Lightroom or ON1 RAW, it’s focussed on editing and that means when you want to start work on an image, Affinity let’s you choose one from a number of different storage locations. To open an image, choose the “+” sign in the top right. Then you’ll have the option to select from any of these sources.
Cropping
Once you’ve chosen the image to edit, the screen will look as below. Generally, tools to select or retouch parts of the image are down the left hand side and tools to make tone and colour adjustments are down the right hand side. To avoid having to remember which symbol is which, touch the “?” at the bottom right and the names of everything will be revealed.
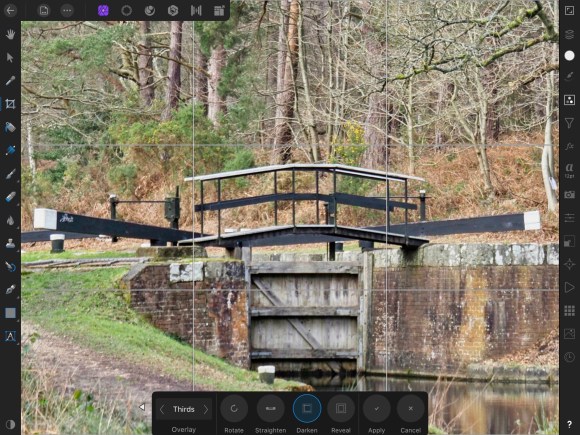
I’ve selected the Crop tool from the left hand side of the screen.
Cropping to reduce the image is done by touching the corners of the image and dragging them across the screen to the point you want.
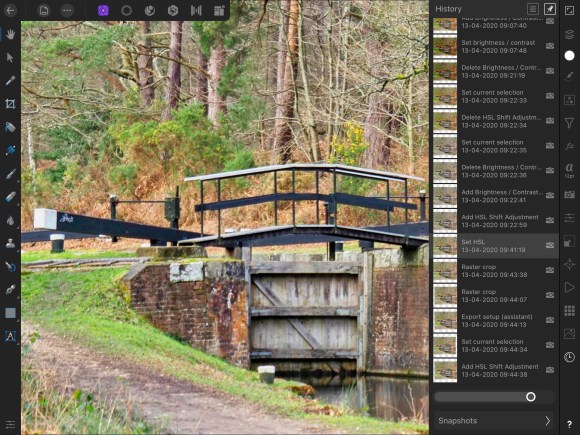
Click the tick labelled “Apply” when you’ve finished. If as you edit, you want to go back and “Undo” one or more things, click on the clock-like icon just above “?” in the bottom right hand corner and you’ll see a complete history of what you’ve done and go back in time !
Tone
Toning and colouring an image in Affinity Photo is best done through adjustment layers. On the right hand side, select the Adjustments section (three circles in a square is the symbol). This will show the range of adjustment layers you can choose. Why “layers” ? Well, the editing process is imagined as if we’re building a stack of layers on top of the original image. Each layer changes the look of the image and when we see our edited image it’s as if we’re looking down through the layers to combine all their effects and get the finished article. This is a handy approach because:
- you can switch layers on and off to see how they’re combining. Touch the Layers icon in the upper right corner and you’ll see all the layers in the current image and you can tick and untick each to see the effect
- you can go back and change or delete layers later. This approach is called “non-destructive editing”. At any point you can backtrack through your work and try again. Double click on a particular layer in the stack to open it and change the editing effect it has.
Amongst the Adjustment layers available, you’ll find “Brightness/Contrast”
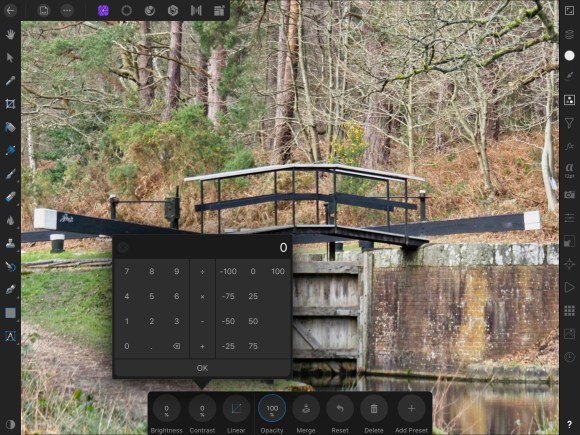
When you select Brightness/Contrast a tool bar appears at the bottom and you can either:
- touch on a control and a panel of values will open as shown in the image above
- touch a control but drag your finger across from it and this will change the value immediately.
After making your change, if you touch the Layers icon, you’ll see that a Brightness/Contrast layer has been added to the image.
Colour
Colour is also adjusted through an Adjustment layer and in this case, we’d choose an “HSL” layer. You may know that HSL (Hue, Saturation, Luminosity) is another way of describing colour – in effect an alternative to RGB (Red, Green, Blue) which Wikipedia describes here https://en.wikipedia.org/wiki/HSL_and_HSV. But all we need to know for now, is that this is where saturation is changed !

Once you’ve finished editing, touching the back arrow in the top left hand will automatically save all your work and return you to the front screen of the Affinity app. However if you want to use your image elsewhere, to send to a friend for example, there’s one more step to do. The image has to “exported”.
Export
Choosing Export from the File menu (the icon is in the top bar towards the left and looks like a page with three dots …) will give you the option about how and where you want to save. You’ll have a choice of formats (JPEG, PSD, TIFF, PDF and many more) together with choices relevant to the format. For example, for JPEG, you’ll be able to choose the size of the image and the quality level, which will together determine the file size. When you choose “OK” you’ll then select the location for the image – either on your iPad or in any cloud storage you may have such as Dropbox, Google Drive etc.
Affinity Photo on Mac
The ideas behind using Affinity Photo on the Mac are pretty similar to the iPad, but of course, the layout of the screen and the position of the controls is a little bit different. You’re the ready to start Editing.
Cropping
Since Affinity is a powerful tool with many options, there are a lot – almost a bewildering amount – of controls. Let’s pick out some important ones.

The basic layout is that “tools” for selecting changing parts of a picture are arranged down the left, but “adjustments” for changing tone and colour etc are down the right hand side.
Let’s find “Crop” first. Working down the tools on the left, a label will appear as you hover your mouse over each and when you find Crop, click on it. It also has a shortcut key of “C”. Once selected, you’ll find a note on how to use the crop tool appears along the bottoms edge of the Affinity window.
Selecting just a part of image is done by grabbing the corners of the picture and dragging them to where you want them. You can then move the crop frame about by clicking and dragging inside it. In Affinity, you rotate the image by clicking and dragging outside the boundaries of the image. When you’ve finished cropping, click “Apply” in the top left hand corner of the window and you’re ready for the next step.
Tone
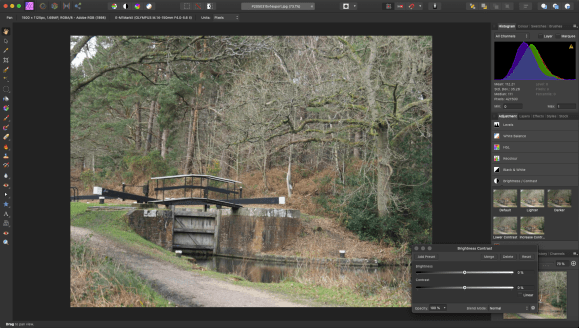
Basic adjustments to the tone and colour for an image appear on the right hand side and there you will find Exposure, Brightness/ Contrast and so on. There are a number of panels available on the right so if you can’t see Exposure etc, make sure that the”Adjustment” tab is selected about one-third of the way down the right. Clicking on Brightness/Contrast opens some small images showing the effect you can have in that section. Clicking on one of the small examples will apply those settings to your image. A popup window showing individual Brightness and Contrast slider control will also appear for you to make fine adjustments.
Colour
In the list of options on the right hand side of the screen there are also adjustments relating to colour including one labelled “HSL”. You may know that HSL (Hue, Saturation, Luminosity) is another way of describing colour – in effect an alternative to RGB (Red, Green, Blue) which Wikipedia describes here https://en.wikipedia.org/wiki/HSL_and_HSV. But all we need to know for now, is that this is where saturation is changed !
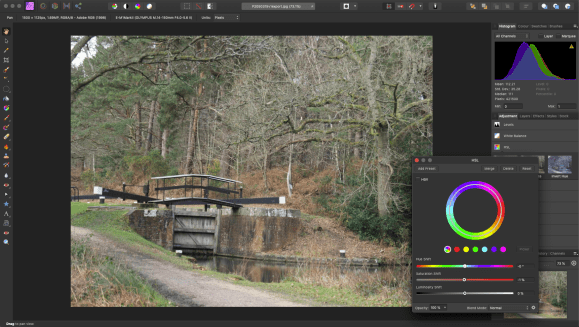
As with Brightness/Contrast above, selecting HSL will open some samples and a small control panel to make fine adjustments. Drag the sliders to create the effect you want and close the small HSL popup window.
Save your image using “Save” from the “File” menu. Then for Affinity Photo as with other advanced editing tools, you have one more step to make your image. You have to “Export” it.
Export
Choosing Export from the File menu will give you the option about how and where you want to save. You’ll have a choice of formats (JPEG, PSD, TIFF, PDF and many more) together with choices relevant to the format. For example, for JPEG, you’ll be able to choose the size of the image and the quality level, which will together determine the file size.

First test comment
LikeLike
3rd comment
LikeLike
Here’s a 2nd comment
LikeLike